Hello on the blog with Clear Scraps today and I have created a hinged Window Shaker! I love this and it was such a fun project, I hope you enjoy it too!
To start off this project, I had this vision of what I wanted it to look like but I wasn't sure how to achieve that look, so I started by die cutting all kinds of small leave images from some of my Gelli plate printed papers in greens, yellows, and blues. I wanted a variety to choose from and not run out.
I then decided to use washi tape to cover the back of the window. I generally apply glue then add the washi tape then cut off the edges.

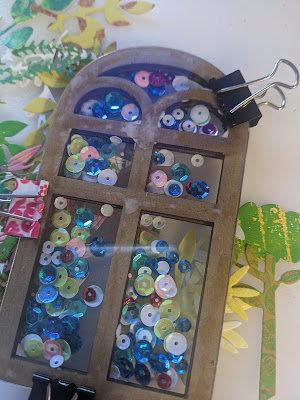
While the washi tape was drying, I put together the acrylic window. First I had to cut another piece of acrylic because I wanted to add sequins to the front of the window. Pulling out some packaging, I traced around the window and cut out another piece to go on the back. I glued a chipboard window to the back of the acrylic then another chipboard then added the sequins in Ocean and Lovely colors then added the acrylic to the back of this sandwich. You can see it below, the clips are holding it together until it is dry.
After everything was dry, I started to glue down the die-cut pieces to create an illusion of looking through a window. I added leaves to the front and to the inside of the piece after I added the image of the woman peeking out the window. After this was dry, I drilled holes along the edge and tied it together with some string.
Thanks for stopping by, hope you enjoyed this project as much as I did creating it!!
Kelly


Comments
Post a Comment
thanks for leaving a comment!